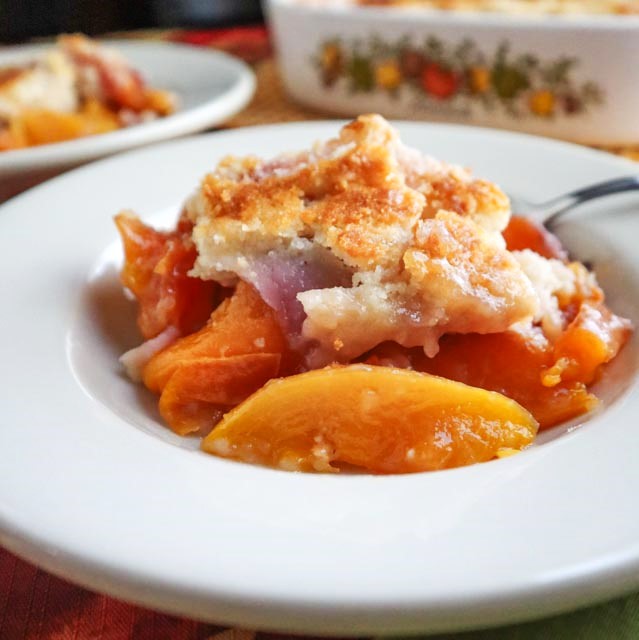
Nectarine cobbler a warm sweet treat
When nectarines are in season they are irresistibly sweet and juicy. This easy nectarine cobbler shows off all that’s great about nectarines. With only a few everyday ingredients and a few minutes of time, you can get a bowl of nectarines ready for the oven to make a warm sweet juicy cobbler. It’ so easy and so good.
Buying produce in season
I bought my nectarines when they were in season. How did I know they were in season? They were on sale. Like all other commodities, when there is a lot of something available, especially perishable produce they are priced to sell.
There is a difference in the appearance, size and flavor of a fruit that is in season. It has likely been vine or tree ripened as it would naturally. But the average shopper doesn’t need to be an expert in fruits to know what’s in season. When buying produce, a sale is a good indicator.
Nectarines are stone fruits
There is a category of fruits called stone fruits. They are called that because they have a pit, also known as a stone, in the middle. The pit protects the seed inside. There’s a range of fruits that are in the category of stone fruits, but in my world the common ones are peaches, plums, apricots and nectarines. All of them are great for cobblers.
Nectarines are my favorite stone fruit. They are all delicious but I always choose a nectarine. There are white and yellow nectarines. The white ones are a little sweeter than the yellow. The flesh of a white nectarine is a pale whitish almost translucent color, not at all like the bright yellow orange flesh of a yellow nectarine. Their skins are different too. Both white and yellow nectarines have the customary red purple skin but white nectarines have a blush of white near the stem and and the yellow has a blush of yellow. This cobbler is made with bright yellow nectarines.
Why nectarines are a good choice for cobbler
Nectarines are easy to make into a fruit dessert. Their skin is thin so you don’t need to peel them before slicing.
Easier is better in my book!
Make the most of your produce $
I don’t usually buy nectarines with the thought that I am going to make a cobbler with them. Although that is a a really good reason to buy them. I am usually planning on enjoying them as they are. It’s like bananas. I buy bananas to eat as is, but when they are getting over ripe I make a banana bread or muffins with them. When I buy fruit I never have to worry about it going to waste if it’s not eaten at their peak of freshness.
There are lots of ways to use up your fully ripened fruits before they go bad. And it’s a win, win when you do. You make the most of your dollars spent on fresh produce and you are rewarded with a delicious homemade fruit dessert.
About Cobbler
There’s more than one way to make a baked fruit dessert. You can use a pastry crust to make a fruit pie, you can top your fruit with a biscuit type topping and call it a cobbler, or you can put a few ingredients together and make a crisp or crumble topping.
When making a pie, cobbler, crumble or crisp there are no rules. Generations of cooks have used fruit to make a warm dessert. And that means it all started with “use what you have”. It also means you will be using common ingredients. Flour, oats, sugar, butter, and milk are all classic ingredients in a fruit dessert topping.
This cobbler topping
We are going to take a shortcut with our cobbler crust. We are going to use a biscuit mix. Using the biscuit mix we don’t need to get out the usual dry ingredients separately and measure them, so it will be quicker with less clean up. But it’s still homemade.
Here’s what YOU WILL NEED:
For the nectarine filling
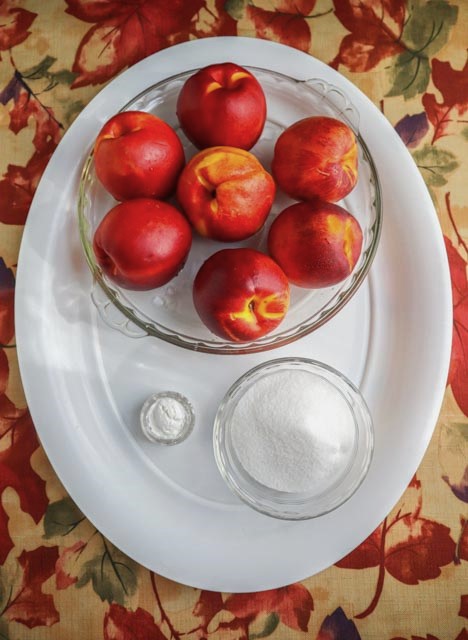
| 6-8 ripe nectarines |
| 1/2 cup sugar (or 3/4 cup if you want a sweeter sauce) |
| 1 teaspoon corn starch |
About these ingredients
About the nectarines
The nectarines need to be fully ripened. They should be soft enough so if you press into them lightly there is some “give” to the flesh. Stone fruits that are as hard as a baseball won’t get you the sweetness and texture you want in a dessert and they are miserable to work with.
Sugar, why and how much
Some sugar is a good idea because it will macerate the fruit. Macerate (the ‘C” is pronounced as an “S”) is a term that means to draw the juices out of an ingredient. We will say more about that process later in the post. If you want to cut down on the sugar I would suggest you add at least 1/4 cup. After that, you can judge for yourself how sweet you want your fruit to be.
If you use the 1/2 cup suggested for 6-8 nectarines it doesn’t add a lot of sweetness to the fruit. If you use 3/4 of a cup, the sauce in the finished dessert is similar in sweetness to what you get in a can of fruit that is labeled as packed in heavy syrup. I usually get canned fruit that is packed in natural juice, but when I am in dessert mode adding 3/4 of a cup of sugar tastes pretty darned good to me, and my family likes it sweeter too.
Corn starch
You do not need to add corn starch. Fruit has pectin. Pectin is a natural thickener. So the juice you have in the baking dish is going to thicken as it cooks all on it’s own. I am adding corn starch to make the sauce even thicker in consistency. That is one of the primary reasons you would add corn starch to anything you are cooking.
I have made this and other cobblers without thickening the sauce and it is great. With the corn starch added, when I spoon the cobbler out, the sauce will coat the fruit. Without corn starch it is more like a thick syrup. In any case, I am not using a lot of it. This recipe calls for 1 teaspoon for the juice of 6-8 nectarines.
About the cobbler topping ingredients
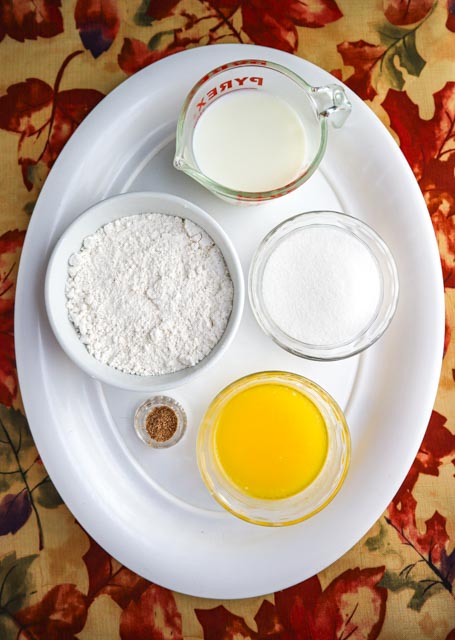
| 1 + 1/2 cups biscuit/baking mix |
| 3/4 cup sugar |
| 1 cup milk (any kind you want) |
| 1/2 cup of butter melted (1/2 cup =1 stick of butter =8 tablespoons) |
| 1 teaspoon nutmeg, cinnamon or 1/2 teaspoon of each we are using nutmeg but cinnamon is really good too |
Biscuit / Baking Mix
Have you ever used a multipurpose baking mix? “Bisquick” is probably the most commonly known brand. A baking mix is found in the dry baking goods section of the store, somewhere near the flour. People commonly use a baking mix for pancakes and waffles or yes, biscuits.
Using a baking mix is a shortcut because it has flour, leavening agents and salt already mixed together in proportionate amounts for specific baked goods. A leavening agent is usually baking powder, baking soda or both. It’s the leavening agent that makes whatever we are baking rise. There are many more ingredients and cooking methods that are used for leavening, but in everyday baking these are the common ones. I don’t use a baking mix often but I keep a small box in my cabinet for small quick baking jobs like this cobbler.
I put the cobbler crust on top of the fruit. Some recipes call for you use it as a bottom crust. This topping batter is very thin in consistency and seeps down into the fruit as it cooks. It’s like a soft cookie crust on the outside and the topping that runs down into the fruit is more like a soft biscuit that is saturated with the sauce. Sounds good doesn’t it?
Milk, Sugar, Butter, Spice
Use any type of milk you want and any sweetener you would usually use in place of sugar. You can use margarine or any other oil you like in place of butter. And you can use whatever spices you like in your desserts.
When I substitute I use the same amounts or equivalent amount as we have given for the recipe. In other words, if I use almond milk instead of dairy milk, I use the 1 cup called for in our recipe. This is an easy recipe to adapt to your own tastes.
This is WHAT TO DO:
Don’t use metal
Metal can interact with certain ingredients to make an unwanted “tang”. Have you ever bitten into a piece of aluminum foil? There is no way to explain what it feels like is there? Using a metal vessel for soaking fruit is the same thing.
The exception to the rule is using stainless steel. Cooking equipment and utensils made of stainless steel are not cheap, but they are suitable for any cooking or baking job.
When you are macerating or cooking something with a lot of liquid, use glass, pottery or ceramic bowls and/or baking vessels.
The baking dish
I am using my 10 inch (2.5 quart) baking dish. It is great for this and so many other recipes. It is the baking dish I use the most. I will have one layer of fruit and a thin crust on top. A 9×13 inch baking dish is a fairly common size and will work for this dish also. I have found that a 9×9 inch baking dish or smaller is not large enough to hold this recipe of 6-8 nectarines with room for the crust. Also with the smaller baking dish the layer of topping is thicker and it doesn’t bake all the way through in the middle without burning the top of the crust.
So what if you don’t have a larger baking dish? An oven safe skillet is great for cobblers. Oven safe means the handles can take the heat of the oven. If you want to use a “coated non-stick” skillet check first to see if it is safe to use in a 350 degree oven.
Prepare the nectarines
Wash the nectarines well and dry them off. Nectarines have a thin smooth skin so we are not going to bother peeling them.
We need to get the stone out of the middle, also referred to as the pit. It is an easy quick process as long as the nectarines are completely ripe.
To start, cut the nectarine in half lengthwise. Cut down along the natural indented strip in the skin from top to bottom and up the other side.
Now, hold the nectarine lengthwise with both hands and twist each half in opposite directions. Then pull the halves apart. The pit will stay in one half. Just pull the pit out. If the pit has split open so each side has half the pit you will see the seed in the middle, just use a spoon and scoop the pit out.
Once the pit has been removed slice the nectarines lengthwise in slices about 1/2 inch wide.
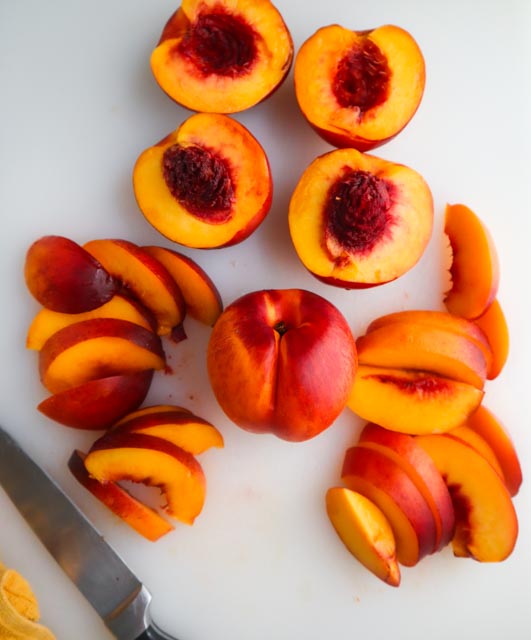
In this picture we have a whole nectarine showing the indented line that goes from the stem end down. We have two already cut in half showing the pits on one side. And we have some nectarines sliced and ready to go.
Macerate the slices
Macerate (the “C” is pronounced as an “S”) is a kind of strange sounding term used to describe a simple technique used in cooking. It’s a term you will see often in fruit dessert recipes. Macerating softens the fruit and extracts some of the fruit’s juice to make a sweet sauce. In this recipe that process is accomplished by adding sugar, mixing it in and letting it sit.
When making a cobbler, crumble or crisp, if you want to thicken the sauce that is going to be created by the sugar and the juices of the fruit, you can add a little corn starch. Some might use flour, but I prefer cornstarch in most desserts. Flour can clump up and sometimes has a raw taste if not cooked long enough.
Add the sugar to the nectarine slices and mix well
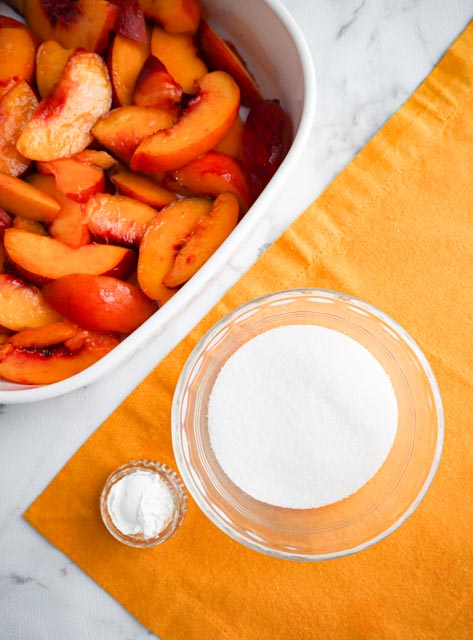
Add the sugar (and corn starch if you are using it) to the sliced nectarines and mix well.
I mixed the cornstarch and sugar together before adding it to the slices. This will help to distribute the cornstarch evenly. Like flour, cornstarch can clump up. Mixing it with the sugar makes it a lot less likely to happen in our cobbler.
Let the fruit and sugar do the work
My nectarines were very ripe and the flesh was soft to begin with, so these slices don’t have to rest in the sugar for long. A firmer less ripened fruit will need longer. This fruit will only need about a half hour to soften and sweeten up, but I can let it to rest longer if I want to finish the recipe later. You can even leave it in the refrigerator overnight. The firmer the flesh of the fruit is, the longer it will take for it to soften. If you haven’t waited for the fruit to get soft you will be disappointed with the finished dessert.
Leaving your sliced fruit mixture macerating at room temperature is fine for a couple of hours, but If you are going to be macerating for several hours or overnight put your fruit mixture in the refrigerator.
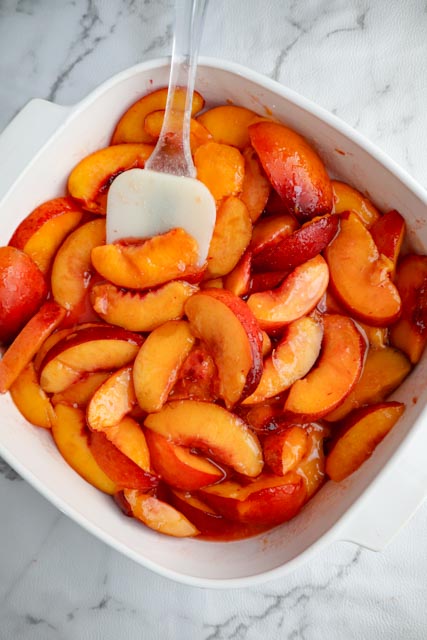
I have mixed the sugar and cornstarch into the sliced nectarines to start the maceration process. I need to let this sit for at least a half for the juices to accumulate.
Let’s get started on our topping
Start by melting butter
Cut your butter into slices or cubes. Put them a small dish or cup and melt the butter in the microwave.
I start with 30 seconds. If the butter isn’t all melted I stir the pieces of butter that haven’t melted around. That is sometimes enough to let those chunks of butter melt slowly into the warm melted butter. If that doesn’t work I use 50% power in 10 second intervals.
When baking, how your butter has melted makes a difference. When your butter has melted too fast it can “break”. What “break” basically means is the components within the ingredients break away/separate. If the butter breaks it will not have the consistency you need to get the best result from your recipe.
Here’s a look
Stages of melted butter
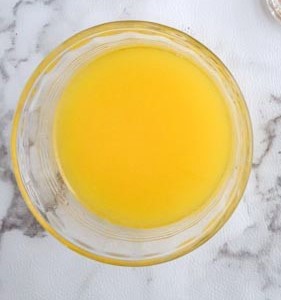
Here is the melted butter from the ingredients picture. The melted butter is all yellow with no clear liquid. This is what it should look like when a recipe calls for melted butter.
So I got to this point and thought I should show you what the butter looks like when it has broken. It doesn’t make a world of difference in this recipe but it can in most others so it is worth showing you what the heck a recipe is talking about if it references breaking. It’s usually a sauce, a roux or gravy recipe that would caution against breaking. It’s not just butter that breaks I am using our butter as a good example.
What is it that is breaking?
When fat is given enough heat it will break away from liquid. In this case the butterfat is separating from the water in the butter.
PS: I made a mess of my microwave in the making of these pictures.

The butter has broken. The yellow is butterfat. The clear ring you see around it is the water that has broken from the fat.
In the next picture you can see how the eye can sometimes trick the mind. When you look at the first picture of the broken butter it looks like the water is floating on top doesn’t it? BUT .. water never floats to the top! Oil floats to the top of water. In a shot of the dish inside my microwave you can see that the fat is actually floating on top of the water, which is the little strip of white at the bottom.
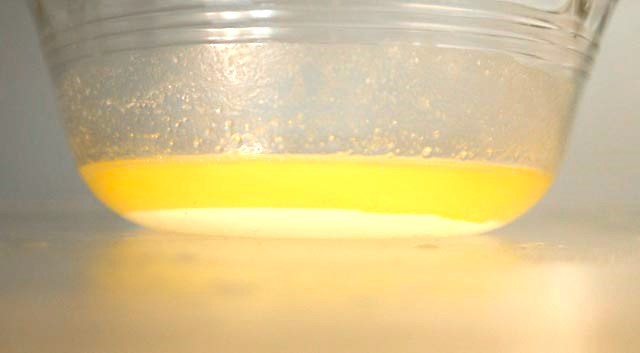
In this picture taken at eye level in the microwave you can see that the water has sunken to the bottom of the dish and the butterfat is floating on top of it.
Taking it one step further
If you heat the butter even longer, the proteins will break from the butterfat. Have you ever gotten a white foam on your over melted butter? That foam is the protein in the butterfat, referred to as milk solids. Have ever heard the term “clarified butter”? That is the butterfat without the water or the milk solids.
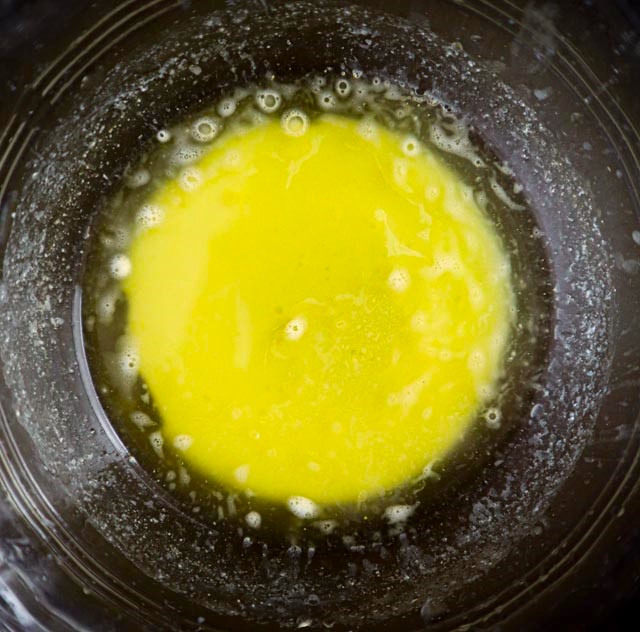
I heated the butter even more after the water had broken and the milk solids (the protein) has broken from the butterfat and that is the white foam is that is floating on top. If you strained the water and solids out you would have clarified butter.
So why so much talk about butter?
If your butter has broken, it is perfectly fine to use. But in a recipe calling for melted butter the 3 components of the butter, the water, solids and butterfat need to be intact or the taste and consistency will be sacrificed.
We have a couple of recipes where it really matters that the fat doesn’t break from the liquid. I mentioned that a roux is affected by broken butter. If you want to know more about a roux, we have details on that in SALMON and PEAS. When you are making a meat gravy it is not butterfat that can break but the meat fat and that makes for a very greasy gravy. You can see more on that in our BACK TO BASICS section with our post on Making your own Gravy.
Okay let’s get back to our cobbler
Mix all the ingredients together in a bowl or large measuring cup
Mix together all the topping ingredients.
This is a thin batter. Because you have added cold milk to the dry ingredients without emulsifying it first you are going to have some lumps. Unlike when you are making a gravy or sauce, that is fine in this recipe.
There are many baked goods recipes where lumps in the batter are supposed to be there. Pancakes, muffins and quick breads like banana bread are examples of batters that are supposed to have lumps.
See more on what emulsifying means in CHICKEN PINEAPPLE STIR FRY.
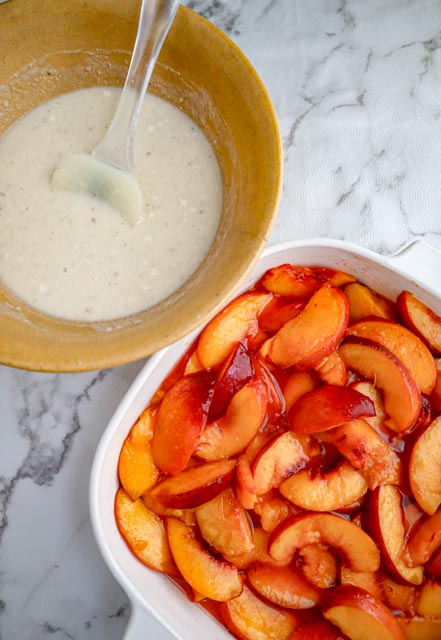
The topping ingredients are mixed together in the bowl.
The softened nectarine slices have been macerating (soaking) in the sugar and corn starch and are now floating in a sweet orange/red sauce.
Pour the topping mixture over the nectarines
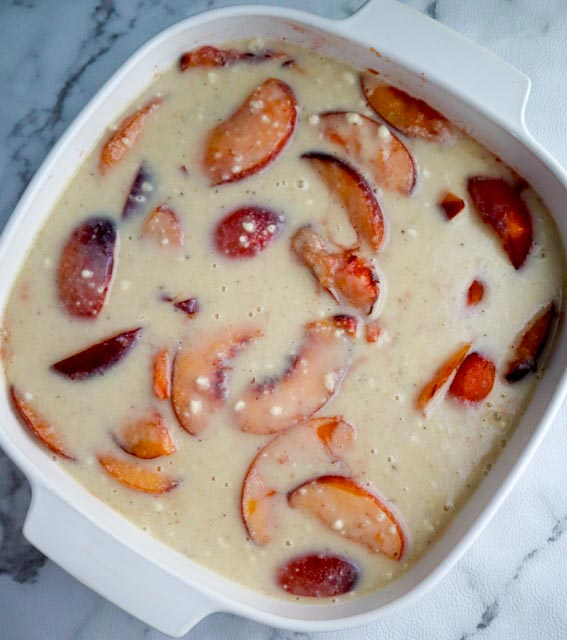
This is what your nectarine cobbler will look like when you have poured the topping ingredients over the macerated slices.
Your cobbler is ready to go into the oven.
Bake
Bake at 350 degrees for 50 minutes. The topping should be golden brown and the edges will be slightly pulled away from the sides of the baking dish.
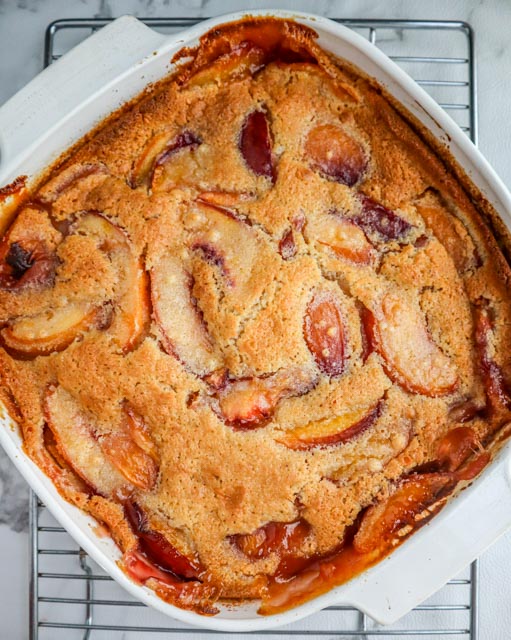
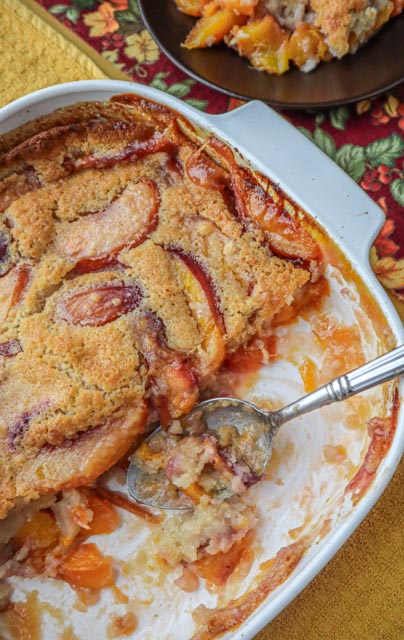
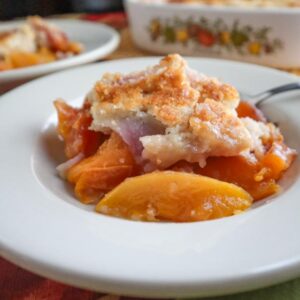
And here is our baked nectarine cobbler right out of the oven. It is crispy on top but underneath is more like a biscuit that has been soaked in our sweet fruit sauce. Delicious!
Serve
NECTARINE COBBLER
Ingredients
- 7 nectarines 6- 8 ripe only
- 1 ¼ cups sugar between filling and crust
- 1 teaspoon corn starch optional for thickening
- 1 stick butter melted (or margarine or oil substitute)
- 1 ½ cup baking mix
- 1 cup milk any kind
- ½ teaspoon cinnamon or nutmeg optional
Instructions
Preheat oven to 350 degrees
Prepare the nectarines
- Use only ripened fruit for this dessert
- Cut the nectarine in half lengthwise, Then holding the nectarine with both hands turn each half in opposite directions and pull it apart. Scoop the pit out with a spoon.
- Slice the nectarines in ½ inch slices lengthwise. Leaving skin on is fine.
Macerate the fruit in sugar
- Put the cut nectarine slices in a 10×10 or 9×13 inch glass, ceramic or pottery baking dish. You should not use metal pans for macerating unless it is stainless steel.
- Add the sugar (mixed with corn starch if you are using it) to the baking dish and mix it well with the nectarine slices.
- Set aside for at least a half hour or as long as overnight in the refrigerator. The fruit should be softened by the maceration process before you make the cobbler. How long that takes depends on how ripe the fruit is. Well ripened fruit won't take long to render their juices and soften.
Make the cobbler topping
- Mix together the biscuit mix, melted butter, sugar, milk and spice. Combine well but it is okay to still have lumps in the batter.
- Pour the topping over the nectarines.
Bake
- Bake at 350 degrees for 50 minutes. The crust should be golden brown and the slides should be slightly pulled away from the sides of the baking dish.

