Why make your own garlic bread?
My whole family likes garlic bread and for me it’s easier, cheaper and tastes better if I make it myself. I buy a loaf of Italian or French bread and make my own garlic butter spread to slather over it. Then I pop it in the oven to get a nice crispy crust on the outside, a flavorful buttery top and a soft warm middle. It’s really good. It doesn’t take any longer to cook than the bread you buy in the frozen food section. In fact, as I recall, the frozen bread needs to be defrosted to some extent before you cook it. That takes longer than it does for me to get mine in the oven.
I always have everything I need to make garlic bread on hand, except for the fresh Italian or French bread. If I decide I want to make garlic bread as a last minute idea, I use dinner rolls from my freezer. When I have rolls that are left over from a meal, I put them back in the plastic bag they came in and toss it in the freezer for another time. It’s very convenient to have them on hand, and better yet, when it’s time to use them they are free. Not bad for something that would have been thrown in the trash otherwise.
Some meals beg for bread
There are some meals like stews or soups and certain pasta dishes, that need bread on the side. It’s just that simple. The meal is not complete without it! Your own homemade garlic bread brings some personality to bread. It’s perfect for sopping up your extra tomato sauce or dunking into your beef stew or chicken soup. YUM.
Bread is not for garlic alone
Garlic isn’t the only flavor you can use for your butter spread. Depending on the meal you are serving you can use other ingredients for your warmed bread. You can swap the herbs to make a whole different taste. Adding rosemary, thyme or both as herbs to serve with a chicken based stew or soup is great.
When it comes right down to it, you don’t really need to add anything to your butter spread. Just butter your bread or roll, and toast it in the oven. A warm, crunchy crusted bread with a soft buttery top is good with just about anything anytime.
Never too old to learn
One day at work I went into our kitchenette and found a stick of butter on the counter. I put it in the refrigerator. At lunch I mentioned that I had found the butter out and was concerned because I didn’t know how long it had been on the counter. The gal who brought the butter in asked why I would be concerned, adding that she always leaves her opened stick of butter out. WHAT? 😲
Because butter is a dairy product, I always took it as a given that you could only leave it out for a short while. I knew this gal was very health conscious, especially when it came to foods she ate and fed to her family, so my guess was that she knew what she was talking about. Sure enough, looking in to it I found that butter can be left unrefrigerated for up to 2 days with no sacrifice to flavor or nutritional value.
Better made ahead
Not only is it a convenience to make a part of your meal ahead of time, but in some cases letting it sit for a while makes it better. That is true with our butter spread. Letting it sit for several hours gives the flavors time to blend together. Any dried herbs, such as the parsley we are adding here will rehydrate and be more flavorful and fresh tasting. It’s not necessary for you to make the spread ahead. The spread is good to go as soon as you mix it up. But don’t hesitate to make it early, let it sit, and spread it on the bread when you are ready to bake it.
Having learned that butter can be left out of the refrigerator for at least two days, its clear that you can make this butter spread several hours or a day ahead and leave it out on your counter. What you don’t want to do is mix up the spread and put it in the refrigerator. It will harden and you will need to let it sit out long enough to soften again before you will be able to spread it on the bread.
Here’s what YOU WILL NEED:
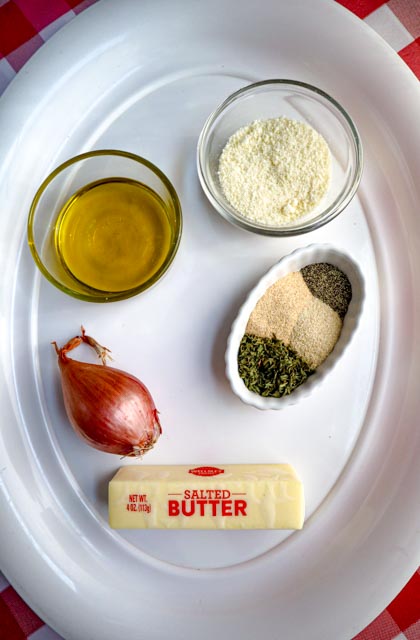
| 1 loaf of Italian or French bread |
| 1 stick of butter (left out a while to soften) or 3/4 cup soft margarine |
| 1/4 cup olive oil ( you don’t need to add it if you are using soft margarine but you can) |
| 2 tablespoon minced shallot or another onion of your choice |
| 1/4 cup finely grated parmesan cheese |
| 1 + 1/2 teaspoon dried parsley (optional) |
| 1/2 teaspoon pepper |
| 1 teaspoon garlic powder (or granulated garlic) but not garlic salt |
| 1 teaspoon onion powder (or granulated onion) but not onion salt |
About the ingredients
Butter or margarine
There is a difference in the consistency of butter and margarine. Each produces different results when melted in the oven on the bread. You can use either.
Butter is a dense consistency. It is a dairy product rich with fat. You need softened butter to make the spread so let it sit out for a while before you try to mix it. To speed up the softening, you can cut the butter into pieces and when soft enough mash it with a fork.
Margarine is usually a mix of vegetable oils. There are tub margarines and margarines in sticks. Both are softer than butter when cold. You don’t need to soften it before starting the spread. I often use a cholesterol friendly margarine in a tub. It is a great butter substitute.
There is a difference in the baked bread depending on which you choose to use. The vegetable oils in margarine melt and seep into the bread. The dairy fat in the butter kind of holds the ingredients together on top of the bread without saturating the bread as much. But, EITHER is great.
If you are using margarine use 3/4 cup and you can omit adding any olive oil if you choose to.
Why add olive oil
That brings us to why we are adding olive oil to our butter spread. Butter is so dense and firm, that even when at room temperature it’s difficult to spread on freshly cut bread without dragging with it chunks of bread. Thinning the butter mixture with olive oil makes it much easier.
But that’s not the only reason. Olive oil on bread is so good. Have you ever had an olive oil dip for bread at a restaurant? If you have liked that, you will love the addition of the olive oil to the butter spread. Butter and olive oil are often combined in recipes and it’s great on an oven toasted bread like garlic bread.
Why not add melted butter to begin with
We are slathering a butter spread on fresh bread so it will melt when it is baked in the oven. So you may wonder why the butter or margarine isn’t being melted before it goes on.
I have found my garlic bread gets soggy and greasy if I melt the butter or margarine before toasting the bread. It is already saturated when it goes in the oven. By adding the butter spread at room temperature and letting it melt into the bread while baking the bread has a crunchy crust, a slightly crunchy very flavorful top and a soft middle. The three layers of texture in one bite is just the way I like it.
Shallots
I am using shallots for this loaf of garlic bread. Shallots are a type of onion. They are kind of like a mini version of a red onion in appearance but a little milder. I used only half the shallot for the 2 tablespoons of onion I am putting in my garlic butter spread so I put the other uncut half on the prepared ingredients picture so you can see what they look like if you haven’t used them before.
I want to get the onion very finely minced so there is a bit of onion taste in every bite. The small layers of the shallot make a finely minced cut easier. I have used all kinds of onions in my garlic butter spread over the years. They all are fine. Just make sure you finely mince. Not familiar with the term mince? Find out more in Slice Dice Mince and Chop.
I add raw onion to my garlic bread spread for texture and a bite of fresh flavor. It’s not necessary. It’s up to you. We are adding some onion taste with the onion powder also.
Adding garlic flavor
We use granulated garlic from the spice section to flavor the spread. I have found that any amount of raw garlic regardless of how small it is minced is too much of a good thing. I am an avid garlic lover, but even I don’t want raw garlic overwhelming every other flavor in one mouthful. The bread is only in the oven for 15 minutes. The garlic doesn’t have any time to cook. Garlic powder or granulated garlic solves the problem of raw garlic taste.
A tip about buying garlic in the spice section
Don’t buy garlic Salt and/or onion Salt.
Make sure to buy garlic and/or onion in powder or granulated form. Granulated is a grainier texture than powder, they can be used interchangeably.
Not only is garlic salt or onion salt a rip off, but it is impossible to control the amount of salt you are adding to get the flavor you are going for. You can easily over salt or have to settle for less flavor so you don’t over salt.
Powdered or granulated garlic is a bit more expensive than garlic salt because salt is a cheap additive. With garlic salt you are paying for a little flavor and a lot of salt. Consider the extra couple of bucks an investment. I have heard it advised that spices should be replaced often. Maybe true, but I have found garlic and onion powder to last a long, long time while retaining as much flavor as I need. I want my cooking to taste good, but I am not going for a gourmet ranking. If the garlic has been on the shelf for a year or more, it still gives me as much flavor as I need.
Parsley
I add some dried parsley to the butter mix. It has a mild flavor but makes a difference you can taste. I use it for the taste of freshness it adds, but I don’t use fresh parsley. For me it’s too time consuming to chop it up into a mince small enough that won’t look like a salad on top of my bread. The dried parsley rehydrates while cooking and like all dried herbs, it has more flavor than fresh would.
When I first started experimenting with making my own garlic bread, I looked at the ingredient list of a loaf of frozen garlic bread. Parsley was on the list. I tried making mine without parsley first because I didn’t think leaving it out would make a difference. It does. This spread brings a variety of flavors to the finished bread, and parsley is one of them.
Finely grated parmesan cheese
We are using finely grated parmesan cheese in the butter mixture. I usually have a wedge of parmesan but I have often substituted with finely grated cheese from the refrigerated section. In the past I have even resorted to using dried cheese in bottles or cans. Although that is never the best choice for this or any other recipe it works in this.
Finely grated cheese looks almost like a powder. It’s close to the consistency of a course dry sand. I have found that a fine grate is the only cut that works well. If you use a shredded cheese or rustic cut cheese it doesn’t melt in the 15 minutes we are are going to bake the bread. The cheese that hasn’t melted masks the other flavors.
Last but not least we have the star of the show
Bread
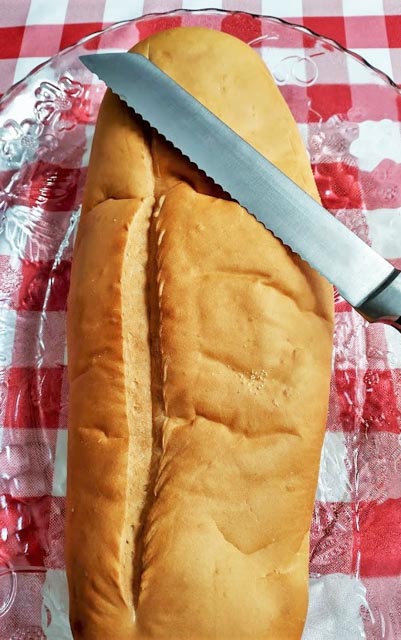
You can use any bread or roll that you want with this butter spread. I am using an Italian loaf. French bread is much the same but usually a little longer and thinner than Italian and with a crisper crust. French bread works great too.
I am going to be cutting the loaf in half lengthwise with the serrated knife you see in the picture. It is called a bread knife because it was made to do the job of cutting bread. A straight edged knife does not work well on fresh bread.
This is WHAT TO DO:
Make the butter spread
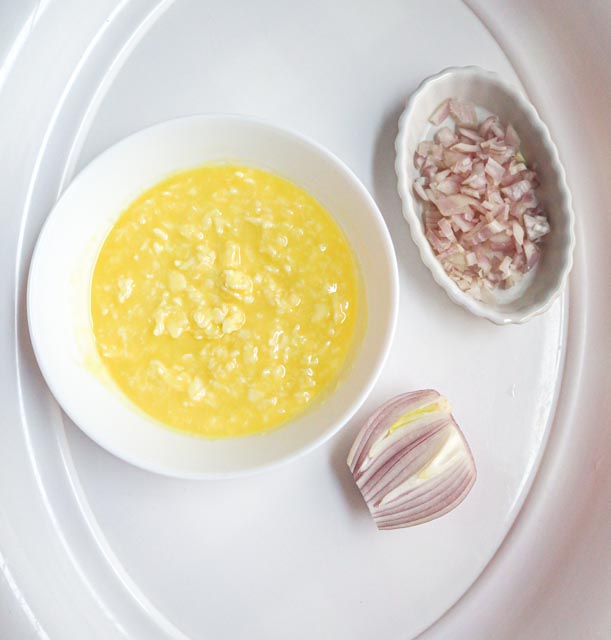
Mash the butter up with a fork and then mix in the olive oil. You will still have some lumps of butter.
Mince the shallot (or whatever onion you are using).
The half shallot I a not using is in the picture to show you what it looks like inside.
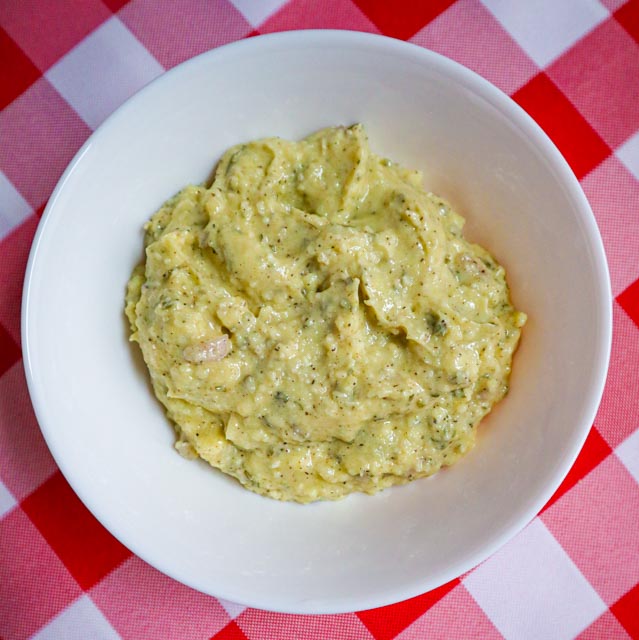
Mix all the ingredients in with the butter and olive oil.
You can let this sit for for several hours without refrigeration. The flavors get stronger if left to rest for a while.
Preheat your oven to 400 degrees
Cut the bread
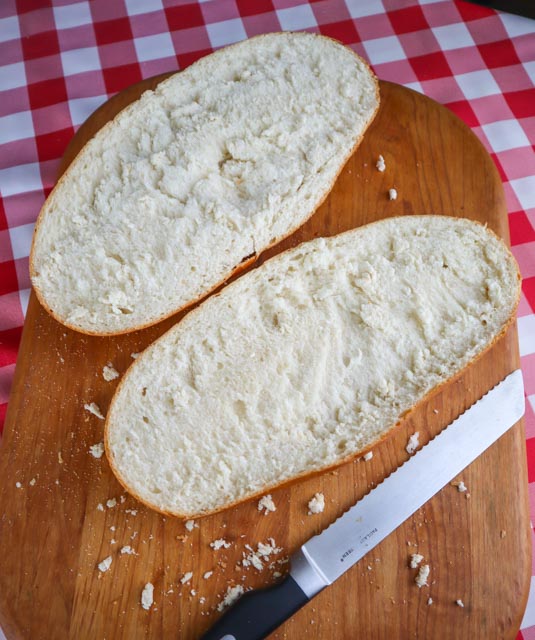
Cut your bread in half lengthwise. Use a serrated edge like the one in this picture. A long serrated edge knife is called a bread knife. It is made for the job. It easily makes a nice clean cut. Use a sawing motion.
A regular straight edge blade makes a mess of bread and it is a very clumsy chore.
Close is close enough
I usually make a shallow cut around the outside of the bread as a guide before cutting all the way through. You are never going to get it cut exactly in half so don’t be disappointed when you see your halves are not even.
If one half loaf is a lot thinner than the other, you may want to check your oven early and take that thinner piece out if it is done.
Slather the garlic butter spread onto your bread
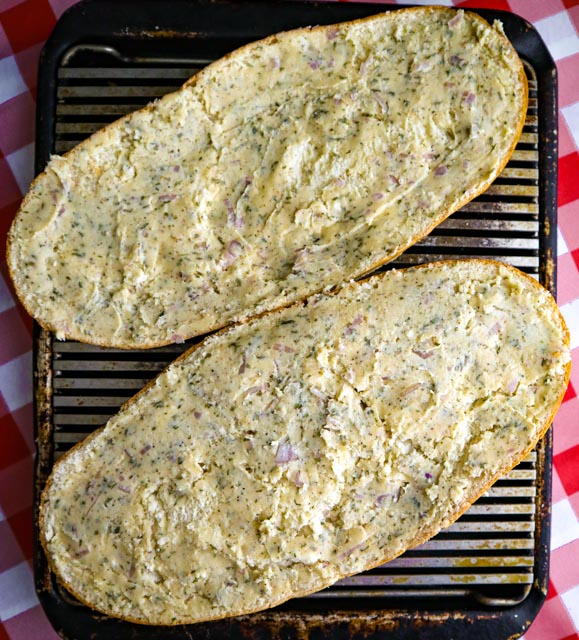
Put the bread crust side down on a baking rack set over a pan. Spread the butter mixture on the open sides of the bread as evenly as possible.
The inside of the bread tears easily as you spread the butter over the top. I spoon the spread on and then push the butter mixture in all directions with the back of the spoon.
It’s ready for the oven
Bake at 400 degrees for 15 minutes.
BUT
Set a timer for 10 minutes and check your bread to see if it needs the extra 5 minutes. If you used French bread the loaf may be thin enough to be done by then. Or your oven may run hot. Garlic bread can burn in just a few minutes.
Burned garlic bread is a family tradition
Thinking about burned garlic bread makes me think of my sister, Laura. She burns her garlic bread quite often. Many times it has been too charred to eat. She is a fine cook otherwise, but burning garlic bread is a curse that won’t let go. Even though the whole family goes on alert when the garlic bread goes in the oven, we end up reminding her too soon or too late. A timer would be a lot more reliable than our family members. 😂
I think most of us have something like that, a nemesis. The more you try to conquer it, the more persistent it becomes. Such is the case with Laura and burned garlic bread.
Hot out of the oven
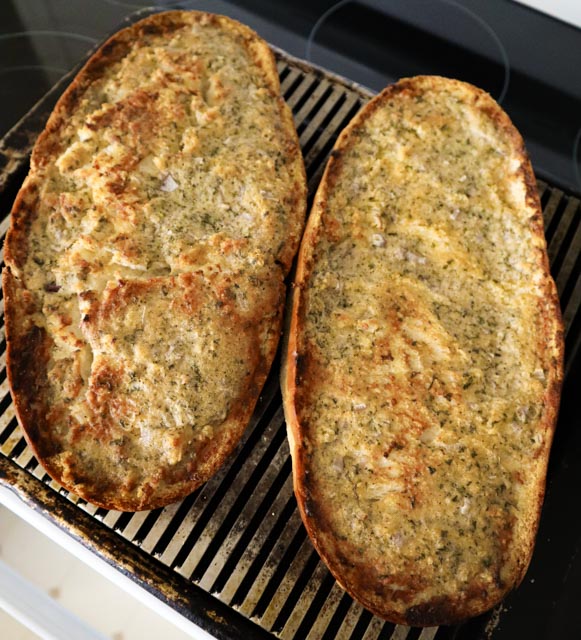
When done, the crust will be browned and crunchy. The butter spread with all it’s flavors has melted over the top which should be lightly browned. The bread in the middle is soft and warm.
Just because
Just because your garlic bread already has butter melted on top, doesn’t mean you can’t add some more before you eat it. Or you can dip the warm bread into garlic flavored olive oil. To make an olive oil garlic dip, crush a couple of whole garlic cloves with the side of a knife and put them in 1/3 cup olive oil. Before you are ready to use the dip, take the garlic out.
Serve warm from the oven
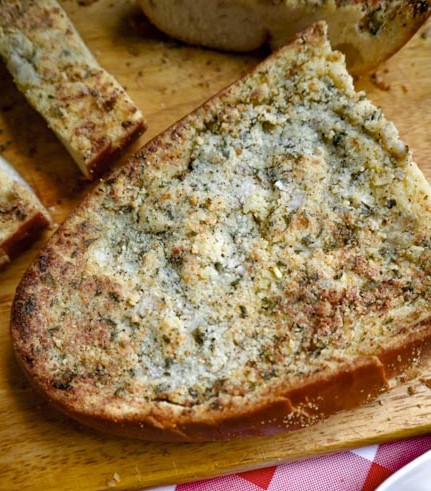
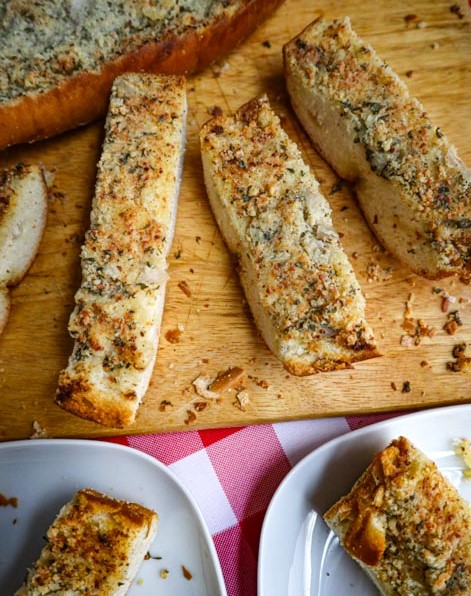
Make your own Garlic Bread
Ingredients
- 1 stick butter softened or ¾ cup margarine
- ¼ cup olive oil
- ¼ cup parmesan cheese finely grated
- 2 tablespoons shallots or any onion finely minced
- 1½ teaspoon dried parsley
- 1 teaspoon garlic powder or granulated garlic
- 1 teaspoon onion powder or granulated onion
- ½ teaspoon pepper
- 1 loaf Italian bread or French bread
Instructions
Prepare Ingredients
- Finely mince the shallot.
- Mash up softened room temperature butter in a small bowl then mix in the olive oil.
- Add the minced shallot and all the other ingredients to the bowl of butter and olive oil. Mix until everything is combined well. If you have time, let the butter mixture sit for a while.
- Cut the bread lengthwise. Put the bread, crust side down, on a baking rack with a pan underneath. Spread the butter mixture evenly over the top of each open side of the bread.
Cooking Instructions
- Preheat oven to 400 degrees
- Put the buttered bread in your preheated oven. Bake for 10 minutes then check to see if your garlic bread is lightly browned on top. If not leave the bread in for another 5 minutes.

Never buy frozen garlic bread again. This is so easy to make and absolutely delicious. I wish I had found this earlier
Well thank you so much Jannette! I’m glad you like it. I really appreciate your feedback.