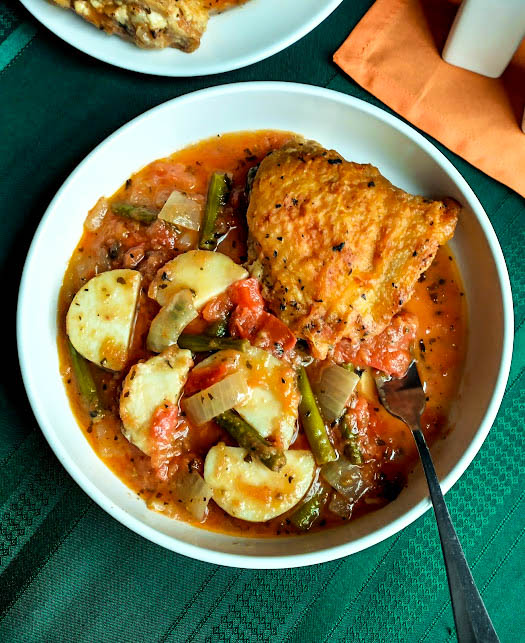
Chicken Cacciatore a great One Pan Meal
What is Cacciatore?
Ricky has told me that cacciatore means catch-of-the-day in Italian. He would know, his grandparents spoke more Italian than English, and he grew up with them. I think that is so neat. He may not be able to recite a sonnet in Italian, but I will tell you what, he knows his food and ingredients in both languages. Goes to show us what most of the conversations were about in those households, huh? When his grandparents were cooking for the family, they were taking what was available that day, simmering it in a sauce and calling it cacciatore. We have chicken and we are making chicken cacciatore.
If you have fresh ripe tomatoes use them
During growing season, when fresh vegetables are abundant, this is a really good meal to make with freshly picked vegetables from the garden (your own or a local growers). I really like that this recipe uses fresh plum tomatoes, rather than canned. Can you ever get enough fresh tomatoes when they are in season? But if you don’t have fresh, you can use a can of whole, peeled plum tomatoes. Since the ingredients are available year round, we don’t consider this a seasonal meal. It is a great meal for a cold night also.
Here’s what YOU WILL NEED:
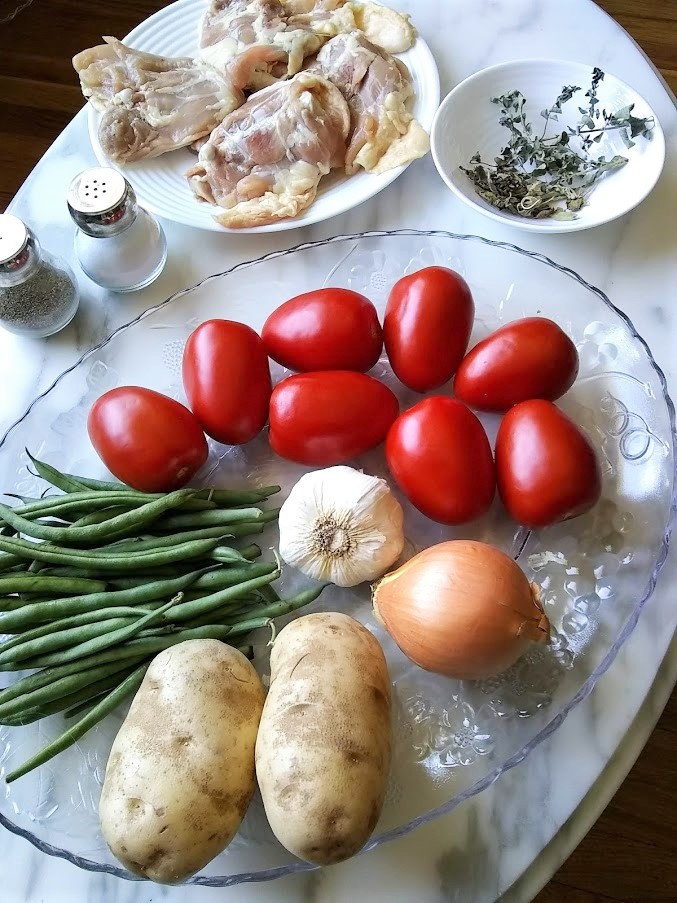
| 4 small chicken thighs and 1 small split chicken breast with skin on and bones in |
| White flour for dredging |
| Olive oil |
| ½ pound fresh green beans |
| 2 medium sized potatoes |
| 8 whole fresh plum tomatoes or a 28 ounce can of whole peeled plum tomatoes |
| 1 medium yellow onion |
| 4 fresh garlic cloves |
| 1 teaspoon salt and 1 teaspoon pepper |
| 2 teaspoons dried oregano |
| 2 teaspoons dried basil |
More about our chicken cacciatore ingredients
The chicken
Can you see the globs of skin and fat on the chicken thighs in the top, left corner of the picture? It is the yellowish flab that I have stretched onto the sides of the dish so you can see it easier. That fat and excess skin will effect the flavor and consistency of your dish. The skin that covers the meat of the chicken pieces will add flavor. But that excess flab needs to come off! We have a discussion on preparing the chicken for this recipe, or any other recipe that calls for skin on, bone in chicken. We also talk about dredging; a term used in this recipe. Read all about it in Trimming The Fat. The thighs in this picture are pretty large and will take up the whole skillet so I am not going to use any more than 4 pieces.
Mix and match the chicken pieces you want
Use your choice of chicken pieces. If your household prefers thighs to breasts or visa versa, by all means mix it up to suit your family. It does not make any difference in the recipe. We would not recommend using wings though. There is a lot of skin on a couple of wings, which will render a lot of fat into the dish. Render is a term we discuss on the TERMS AND TIPS page. Basically, it is a term for the fat being drained out of the meat while it is cooking. Don’t take us wrong. We like a plateful of chicken wings as much as the next guy. But this dish is not a good fit for wings.
About our basil and oregano
See the branches in the bowl next to the chicken? That is my own homegrown oregano and basil from last fall’s harvest, which have been dried. I keep the leaves whole until I use them, to get the maximum flavor. I love growing and then using my herbs.
We have posts about growing herbs in CLAUDIA’S COOKING TIPS. It doesn’t take a special garden. You can grow herbs just about anywhere. They are beautiful plants, they smell heavenly and they are easy to grow. It is really neat to crunch up your homegrown, dried herbs or use freshly picked herbs in a salad or recipe. They have so much flavor! If you are interested in reading more about growing and using your own herbs, start with Back Porch Herb Garden, Cooking with Herb and It’s Drying Time Again. There will be more to come. Beware, once you have grown your own there’s no going back. 😊
This is WHAT TO DO:
Get your vegetables ready
Trim the green beans by snipping off each end of the bean. Kitchen shears are great for this. If the beans are large, cut them in half or thirds. Chop the garlic, onion, plum tomatoes and potatoes. If you are using canned whole tomatoes, pour them in a bowl and crush them by hand.
Cut the potatoes in big chunks. As in all our dinner recipes, don’t bother peeling the potatoes. It is wasted time and you waste nutrients as well. Because Ricky cooks fresh vegetables right in with the other ingredients, the nutrients are making their way onto your dinner plate and not being poured down the drain.
Always wash vegetables before you chop them and/or add them to your cooking. We have a discussion you may want to read in Wash Before You Eat about why washing is a must do. You are cooking with the goal of having a delicious, wholesome homemade meal. Why sacrifice that for the few minutes it takes to rinse off your vegetables.
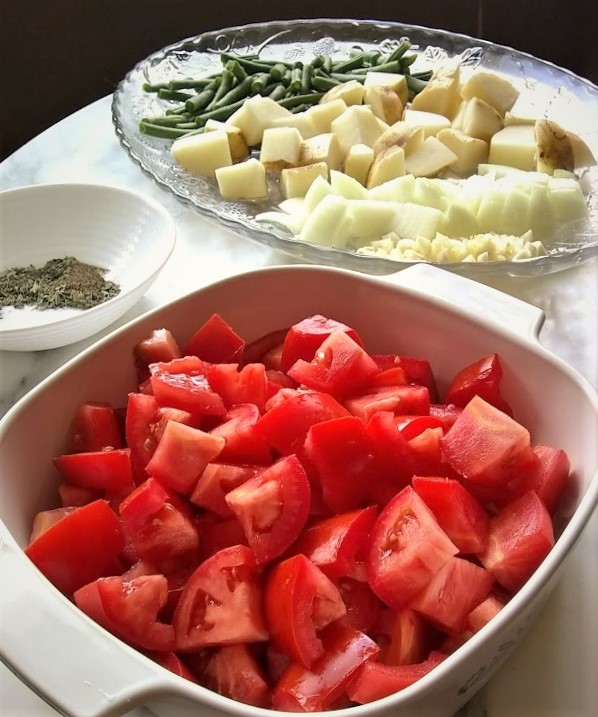
All the fresh vegetables have been chopped. The dried basil leaves and oregano leaves have been ground up by rubbing them in the palm of my hand. Oh…the aroma of the freshly ground herbs is intoxicating. If you are preparing your vegetables hours in advance, you should put the potatoes in some cold salted water and put them in the refrigerator to prevent them from turning brown. It doesn’t effect the flavor or nutritional value if they brown, it just looks kind of lousy.
Prepare the chicken
Next, prepare your chicken. It needs to be trimmed. We show this process in more detail in our discussion Trimming The Fat. But here is a quick version; cut off the flab with kitchen shears.
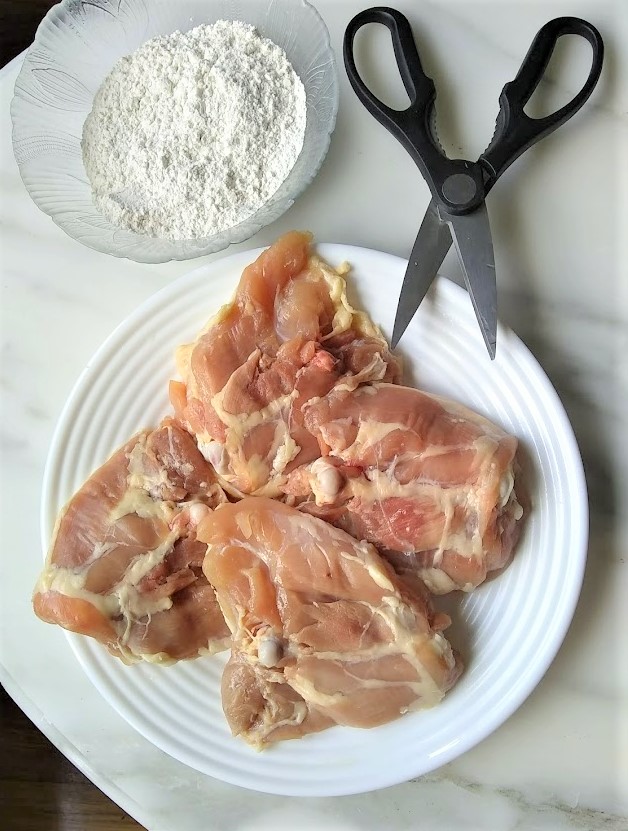
This is what the 4 thighs in the ingredients picture look like after the flab has been cut off. All that flab would be melting into the cacciatore if we didn’t cut it off. There are still some ribbons of fat along the inside of the thighs as shown in this picture, and there is a thin layer of fat under the skin on the other side of these pieces.
A little fat adds a lot of flavor, but too much of any good thing can boomerang and ruin everything. That’s something to keep in mind in all sorts of situations. 🙄
Dredge the chicken
Now you are ready to dredge your chicken in flour. If you don’t know the term dredge, our discussion Trimming The Fat has more “show and tell”, but it is easy enough. Put some flour onto a plate, or in wide shallow bowl or baking dish. Pat the chicken pieces with paper towel to remove any excess moisture, then drag the chicken through the flour, turning it any way you need to in order to cover the whole piece. Then shake off any excess flour.
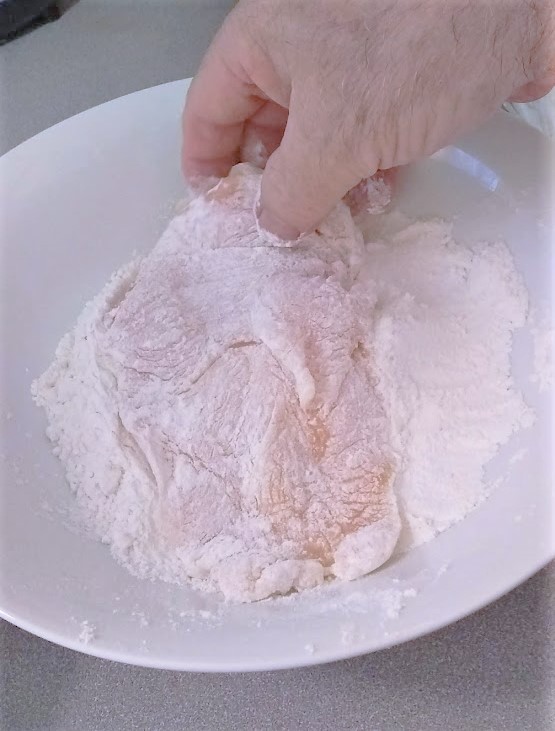
Ricky is demonstrating how to dredge the chicken pieces. Put some flour on a flat plate, or in a wide shallow bowl or baking dish. Pat any excess moisture from the chicken pieces. Take each piece of chicken, one by one, and drag it through the flour until it is completely covered with flour, shake off any excess and put it aside.
What is the purpose of the flour? The light coating of flour, when browned in the olive oil, serves two purposes. The chicken pieces will have a light crispy crust and a different flavor and texture than if you had put them in the skillet raw, with the rest of the ingredients. Also, while you are browning, it is inevitable some of the flour remains on the bottom of the pan. That browned flour will add flavor and thicken the sauce as it simmers.
Now we are ready to get cooking
Fry your chicken pieces in a skillet
Place a heavy bottomed 12 inch skillet on medium high heat and let it heat up, then cover the bottom of your warmed skillet with olive oil. When the oil is got, place the dredged chicken pieces in the skillet and brown on both sides, starting first with the skin side down. The oil should sizzle a bit when you add the chicken. If it isn’t, turn up the heat. Cook each side until it’s golden brown and the skin is crisp.
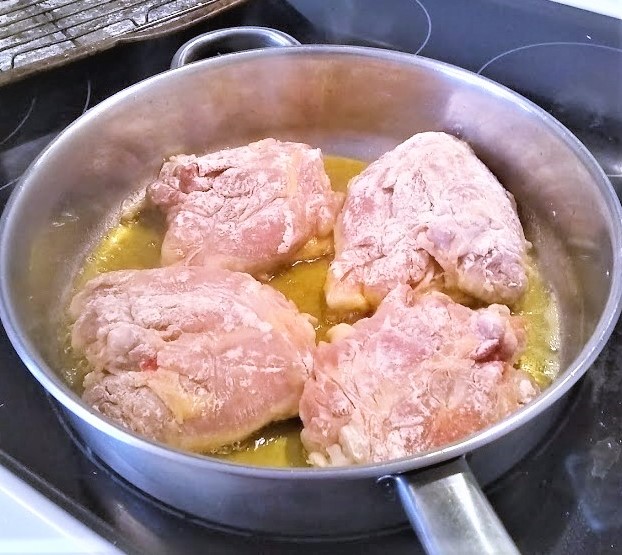
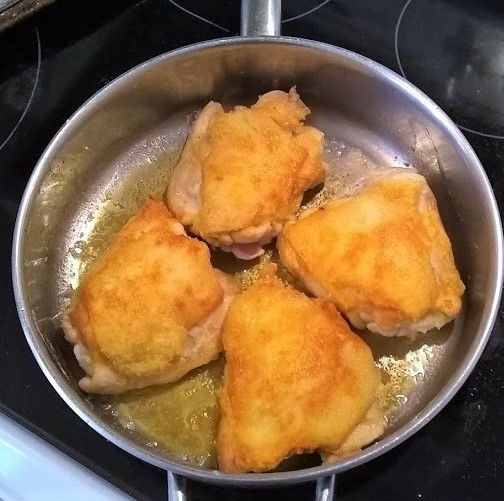
Add your chopped vegetables
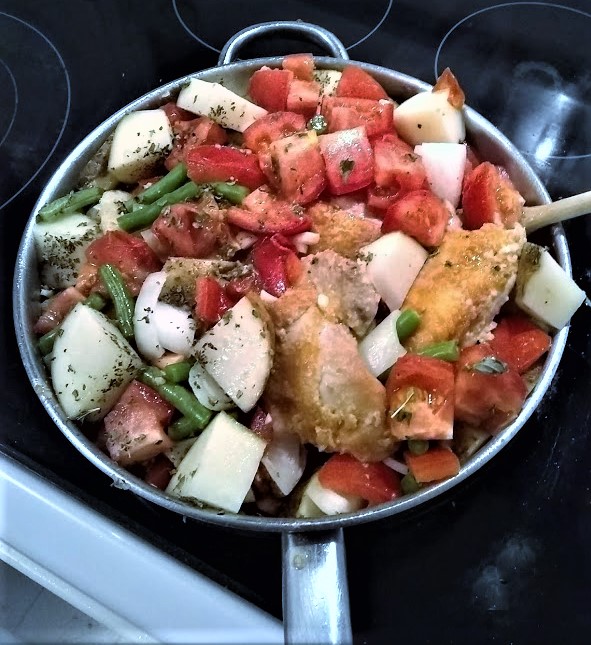
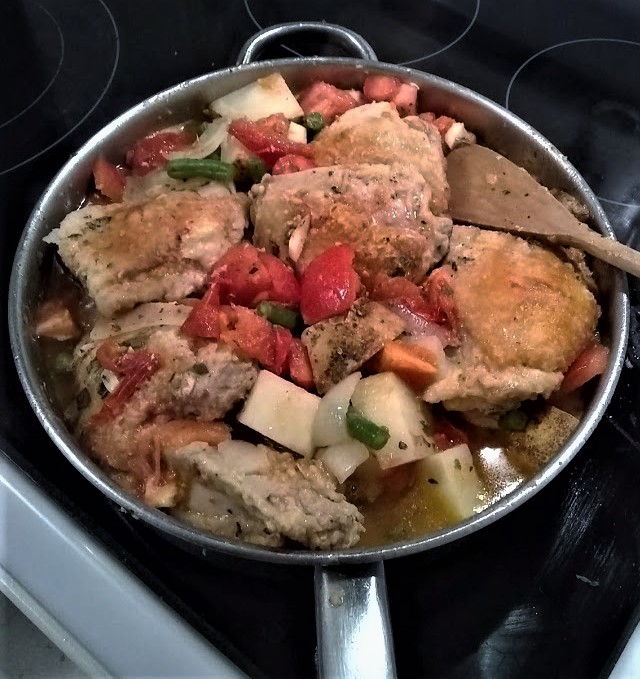
When both sides of the chicken are browned, Add all the other ingredients to the skillet.
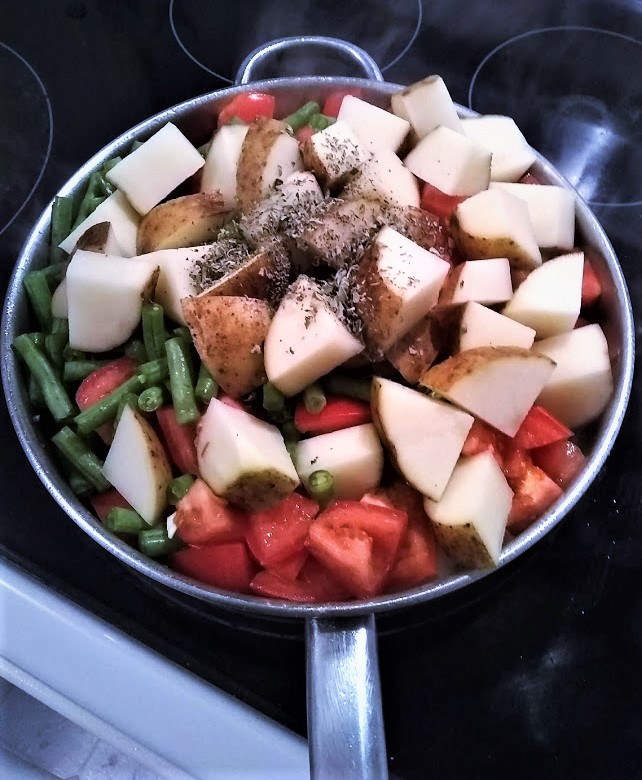
.
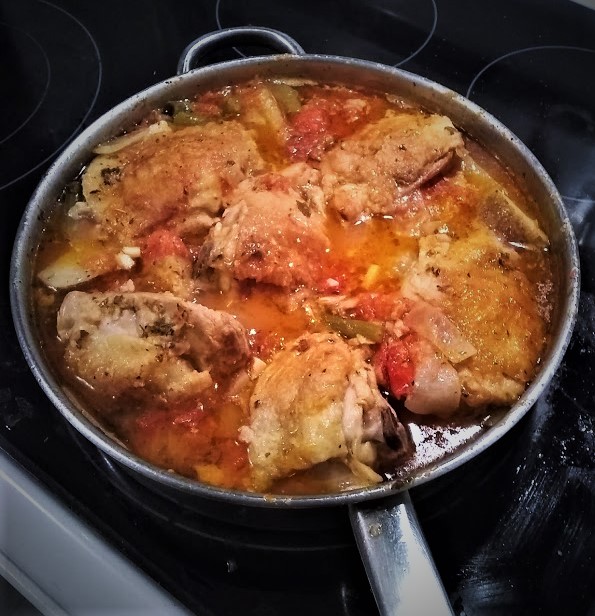
Keep stirring gently
The skillet is heaping full when you add the rest of the ingredients. With the heat still on medium high, move the vegetables around gently to help the tomatoes render their juice. Stay at the stove, stirring, until there is enough sauce in the skillet to pretty much cover all the other ingredients. It should take about 15 minutes. Turn the heat down to medium low and let the cacciatore simmer, uncovered until the potatoes are cooked. Stir often to ensure everything will cook evenly. Using a wooden spoon helps move the ingredients around without cutting into them. Simmer for 45 minutes.
Serve
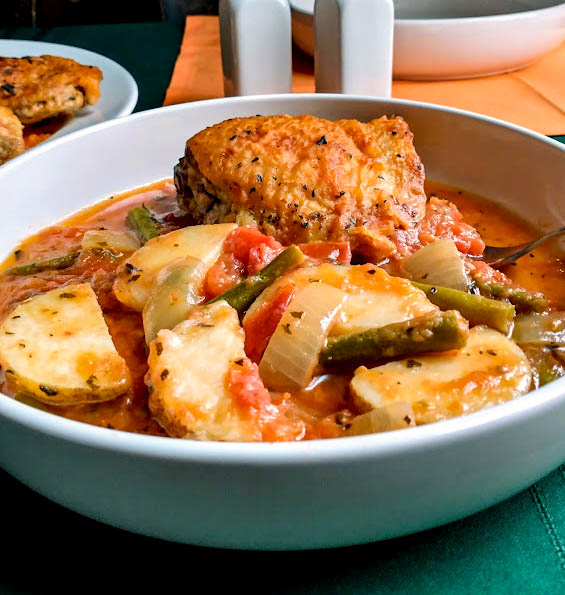
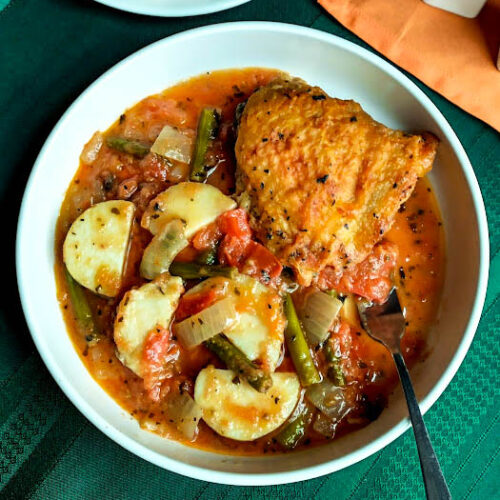
Chicken Cacciatore
Ingredients
- 4 thighs chicken bone in and skin on
- 1 breast chicken bone in and skin on split to 2 halves
- olive oil to cover bottom of pan
- ½ pound green beans
- 2 potatoes mediums sized
- 8 plum tomatoes or 28 oz can plum tomatoes hand crushed
- 1 onion yellow medium sized
- 4 cloves fresh garlic
- 1 teaspoon salt
- 1 teaspoon pepper
- 2 teaspoons basil dried
- 2 teaspoons oregano dried
NOTE: Chicken pieces are getting pretty big these days. Buy what will fit in the skillet.
Instructions
Prepare Ingredients
- Trim the fat from the chicken pieces and dredge them in flour.
- Trim and cut the fresh green beans.
- Chop the tomatoes, garlic and onion.
- Cut potatoes into large chunks.
Cooking Instructions
- Put a 12 inch, heavy bottomed skillet on medium high heat. When warm, cover the bottom of the skillet with olive oil. Let the olive oil get hot enough to sizzle when you add the dredged chicken pieces, skin side down first. Brown the chicken on both sides till almost done.
- With the skillet still on medium high, add the rest of the ingredients to the chicken in the skillet. Gently stir all the ingredients together. A wooden spoon is best for this. As you stir, the tomatoes will start to melt into a sauce. It should take about 15 minutes to get the tomatoes to become a sauce.
- Cook at a slow boil on medium low heat until your potato chunks are tender. It should take about 45 minutes.

